When a hard drive fails, most people fear the worst—permanent data loss. However, not all drive failures are catastrophic. Sometimes, the problem lies in the Printed Circuit Board (PCB) of the drive. If this is the case, there may be a solution: replacing the PCB. In this article, we’ll explore a complete guide to hard drive PCB replacement: when and how to do it, including signs of PCB failure, steps to take, and key precautions.
What Is a Hard Drive PCB?
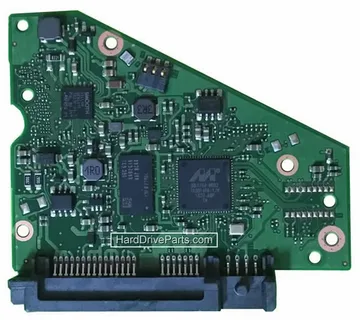
The Printed Circuit Board (PCB) is the green (or blue) board attached to the bottom of a hard drive. It serves as the drive’s brain, managing power, data read/write operations, and communication with your computer. If the PCB malfunctions due to power surges, short circuits, or physical damage, your drive may stop working—even if the internal platters are intact.
When Should You Consider a Hard Drive PCB Replacement?
Understanding when it’s appropriate to consider a PCB replacement is crucial. Here are common signs that your hard drive’s PCB may be the issue:
- Burnt smell or visible scorch marks on the PCB
- No spinning or sound from the drive when connected to power
- Drive not recognized by BIOS or the operating system
- Sudden failure after a power surge or lightning strike
If you encounter these symptoms and have ruled out cable, power supply, or software issues, a PCB replacement might be the answer.
Tools and Precautions Before Attempting Replacement
Before diving into a replacement, understand that this isn’t a casual DIY fix. You’ll need:
- An identical donor PCB (same model, firmware, and PCB number)
- A Torx screwdriver set
- Antistatic wrist strap
- Optional: Hot air rework station (for BIOS chip transfer)
Important: Many modern hard drives have a BIOS chip (or ROM) on the PCB that stores calibration data unique to the drive. Without transferring this chip to the new board, the replacement will likely fail.
How to Replace a Hard Drive PCB
Now let’s go step-by-step through a complete guide to hard drive PCB replacement: when and how to do it:
Step 1: Identify the Drive Model and PCB Number
Find the exact model number, firmware version, and PCB code on the original drive. Use this info to locate a matching donor PCB—websites like HDDZone or donor drives from the same batch can help.
Step 2: Transfer the BIOS/ROM Chip (If Necessary)
If your drive requires ROM transfer:
- Locate the ROM chip on the damaged PCB (often marked as U12 or similar)
- Carefully desolder it using a heat gun or soldering iron
- Solder the ROM chip onto the replacement PCB in the same orientation
Step 3: Swap the PCB
- Use a Torx screwdriver to remove the screws holding the old PCB
- Install the donor PCB, ensuring all connectors align perfectly
- Reattach screws and handle all components with anti-static precautions
Step 4: Test the Drive
Connect the drive to your computer. If the replacement was successful, the drive should spin up, be recognized, and data should be accessible. Immediately back up your data, as this may only be a temporary fix.
Risks and Considerations
Even following a complete guide to hard drive PCB replacement: when and how to do it, success is not guaranteed. Potential risks include:
- Incompatibility between PCB versions
- Failed BIOS chip transfer
- Internal mechanical failure mistaken for PCB issues
If your data is critical, consult a professional data recovery service before attempting any repair.
Conclusion
While not suitable for every failure, PCB replacement can be a cost-effective solution when done correctly. This article has walked you through a complete guide to hard drive PCB replacement: when and how to do it, helping you decide whether it’s the right move. With the right tools, knowledge, and care, you might just bring your drive—and your data—back to life.


